How to Install WordPress via XAMPP
A Beginner's Installation Guide

Installing WordPress via XAMPP is a great way to set up a local development environment for building and testing websites. Here's a beginner's installation guide:
Step 1: Download XAMPP
Go to the Apache Friends website and download the latest version of XAMPP for your operating system (Windows, macOS, or Linux).
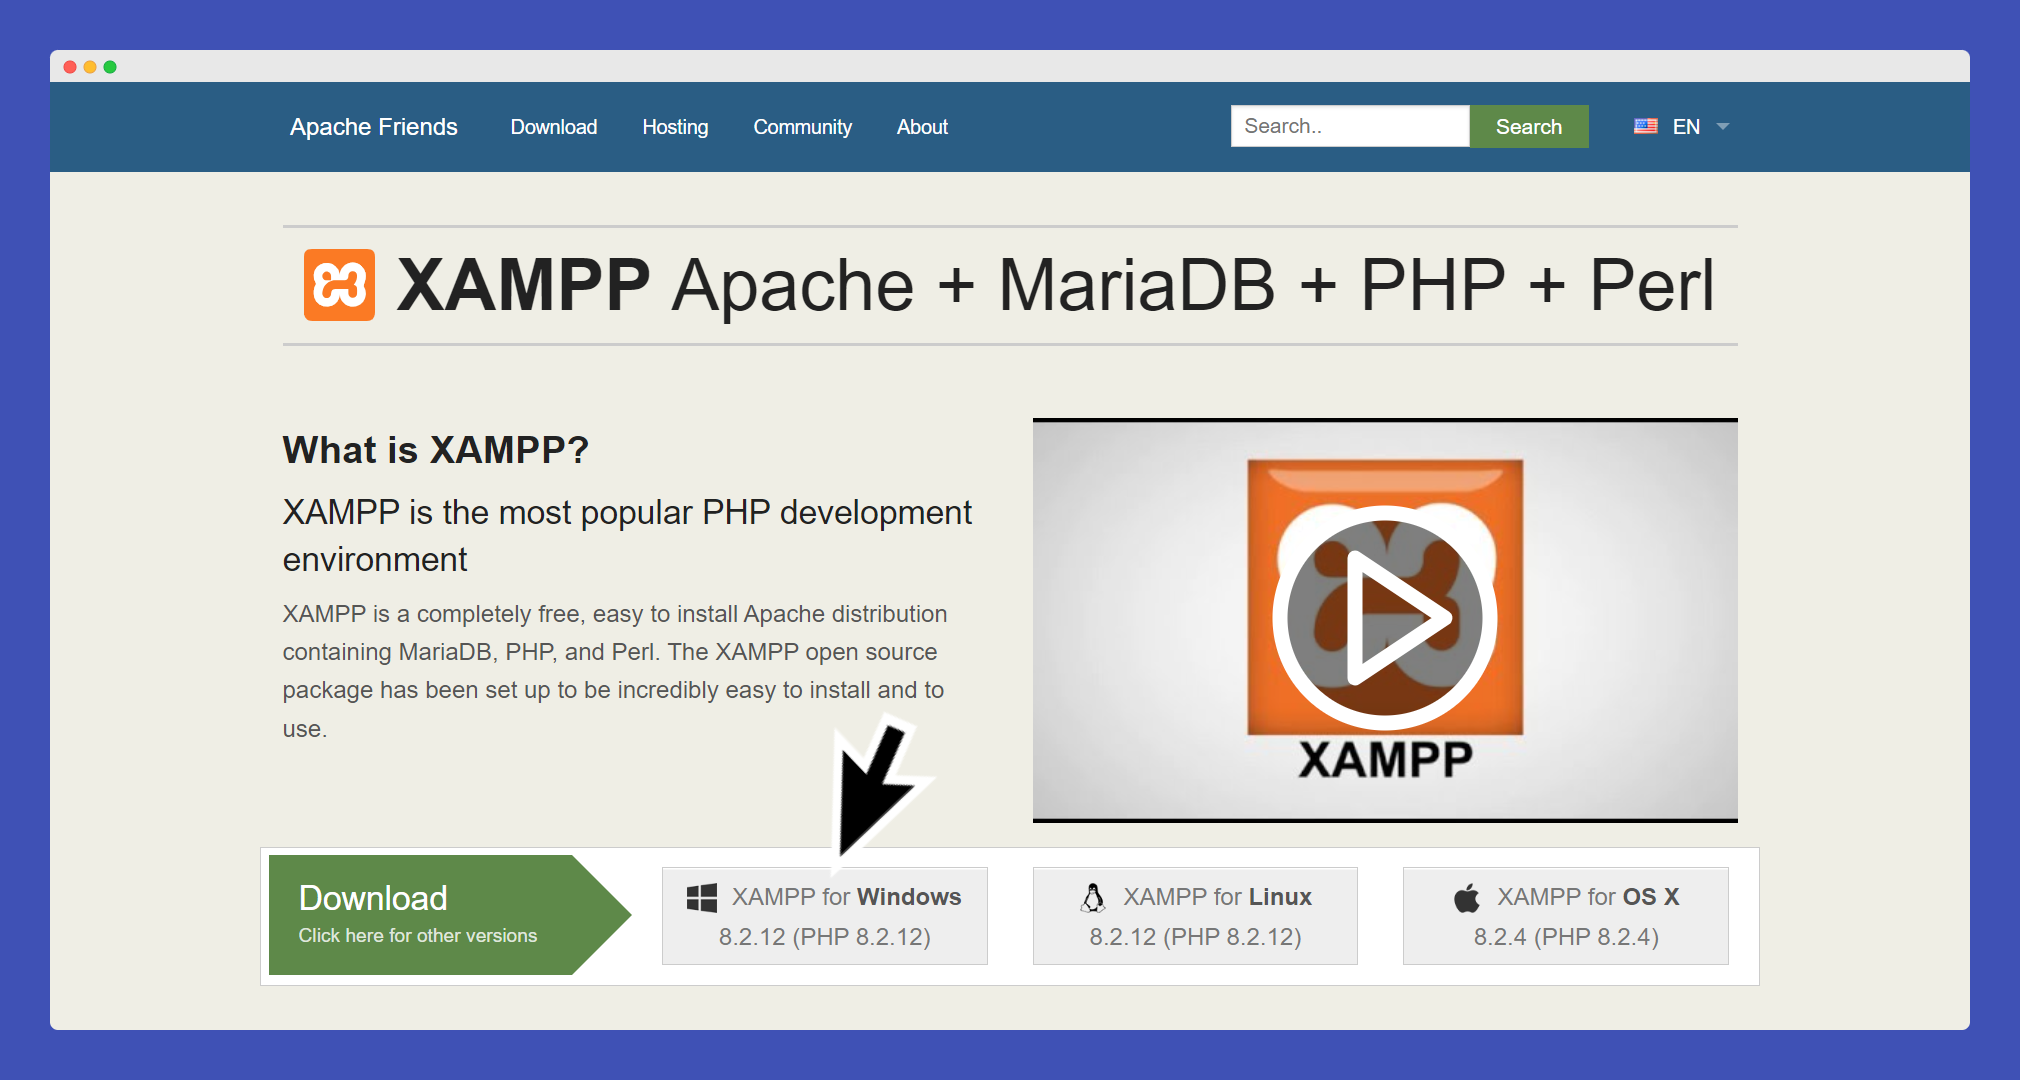
Follow the installation instructions provided by XAMPP to install it on your computer.
Make sure to remember the installation directory, as you'll need it later. The Default directory is normally c:/xampp
Step 2: Start XAMPP and Start Apache and MySQL
Once installed, start the XAMPP control panel.
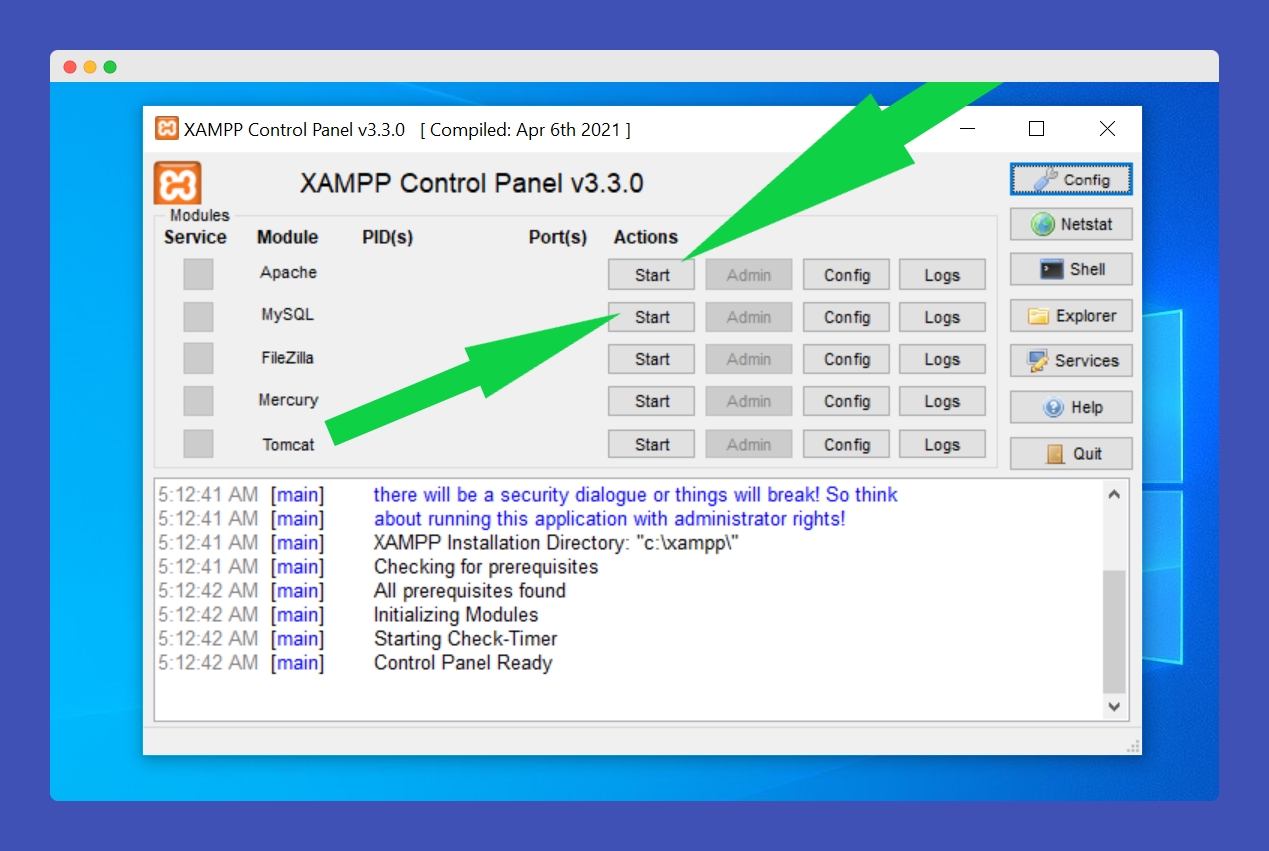
Start both the Apache and MySQL modules by clicking on the "Start" button next to each.
Step 3: Download WordPress
Go to the WordPress official website and download the latest version of WordPress.
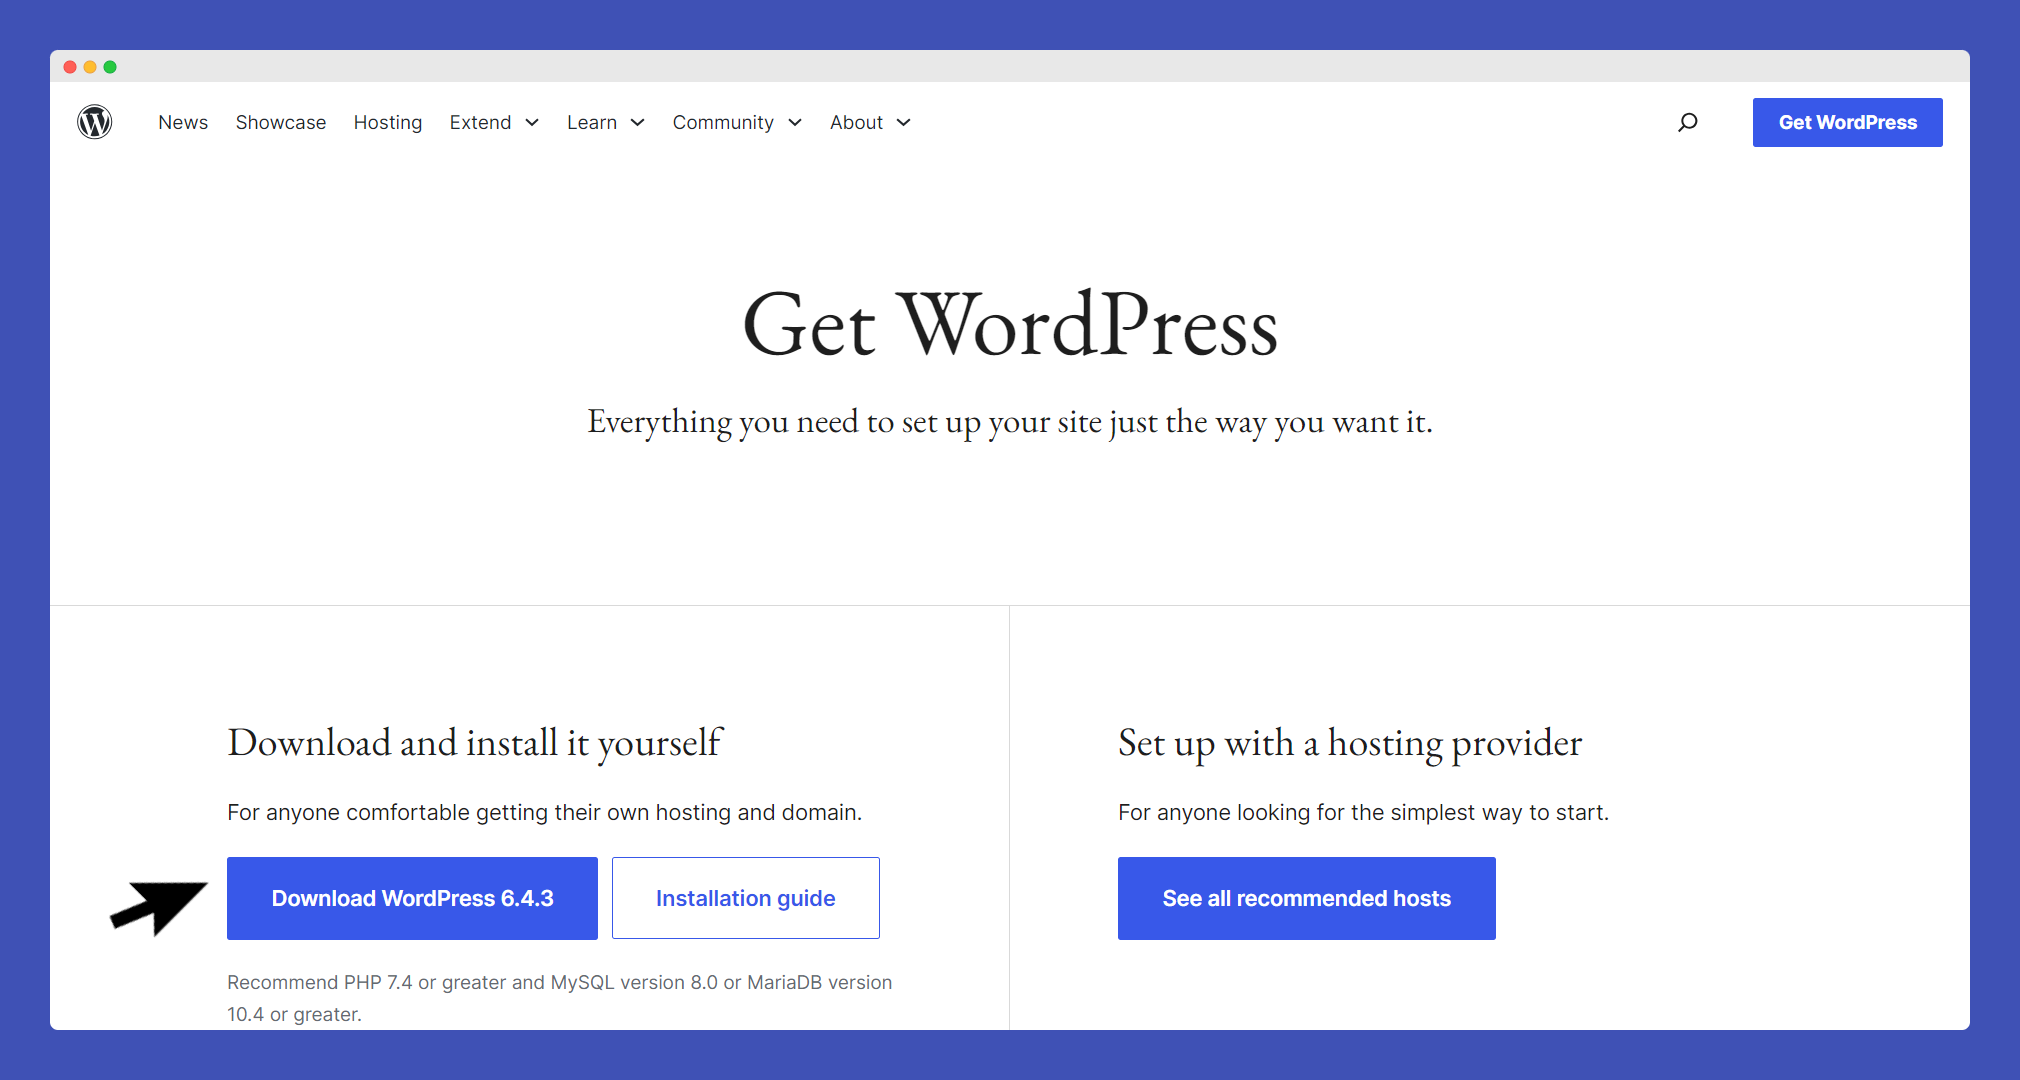
Extract the WordPress zip file to a folder directory.
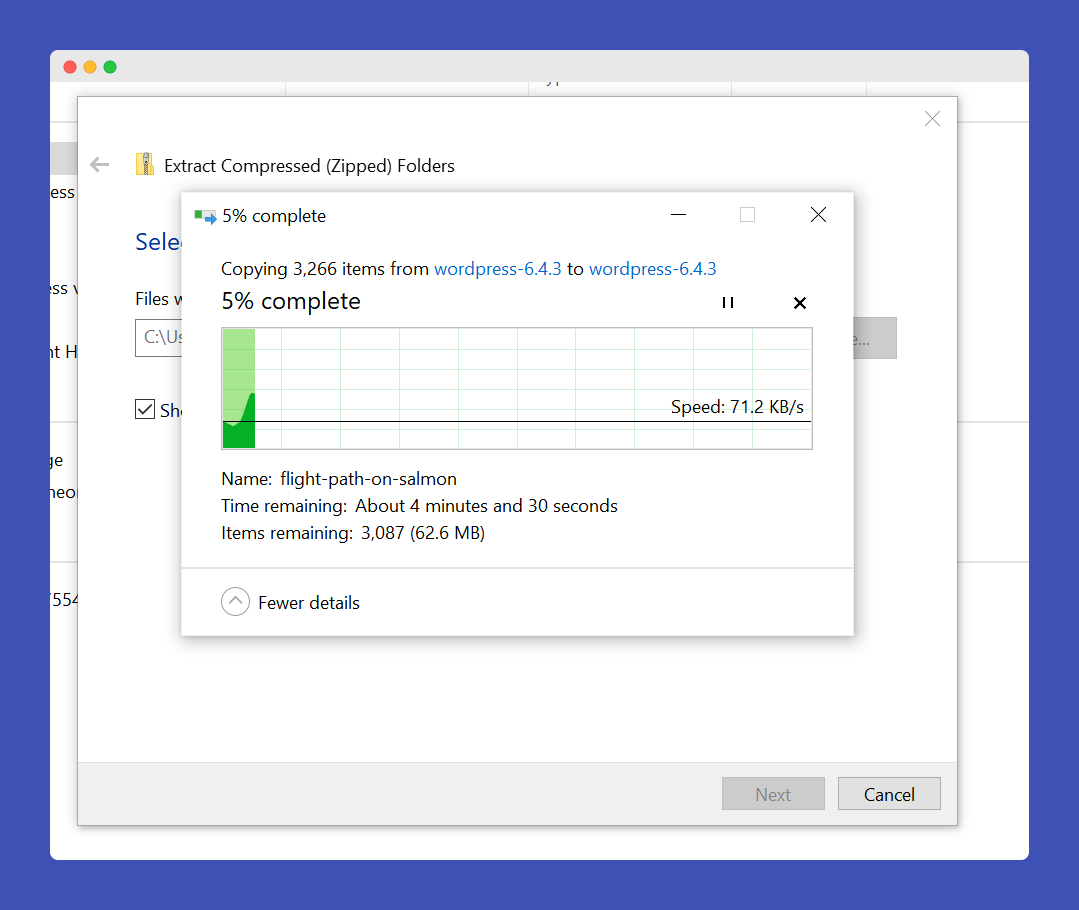
Copy the extracted files to the xampp folder. Typically, this would be in the htdocs folder.
Step 4: Create a Database for WordPress
Open your web browser and go to http://localhost/phpmyadmin/.
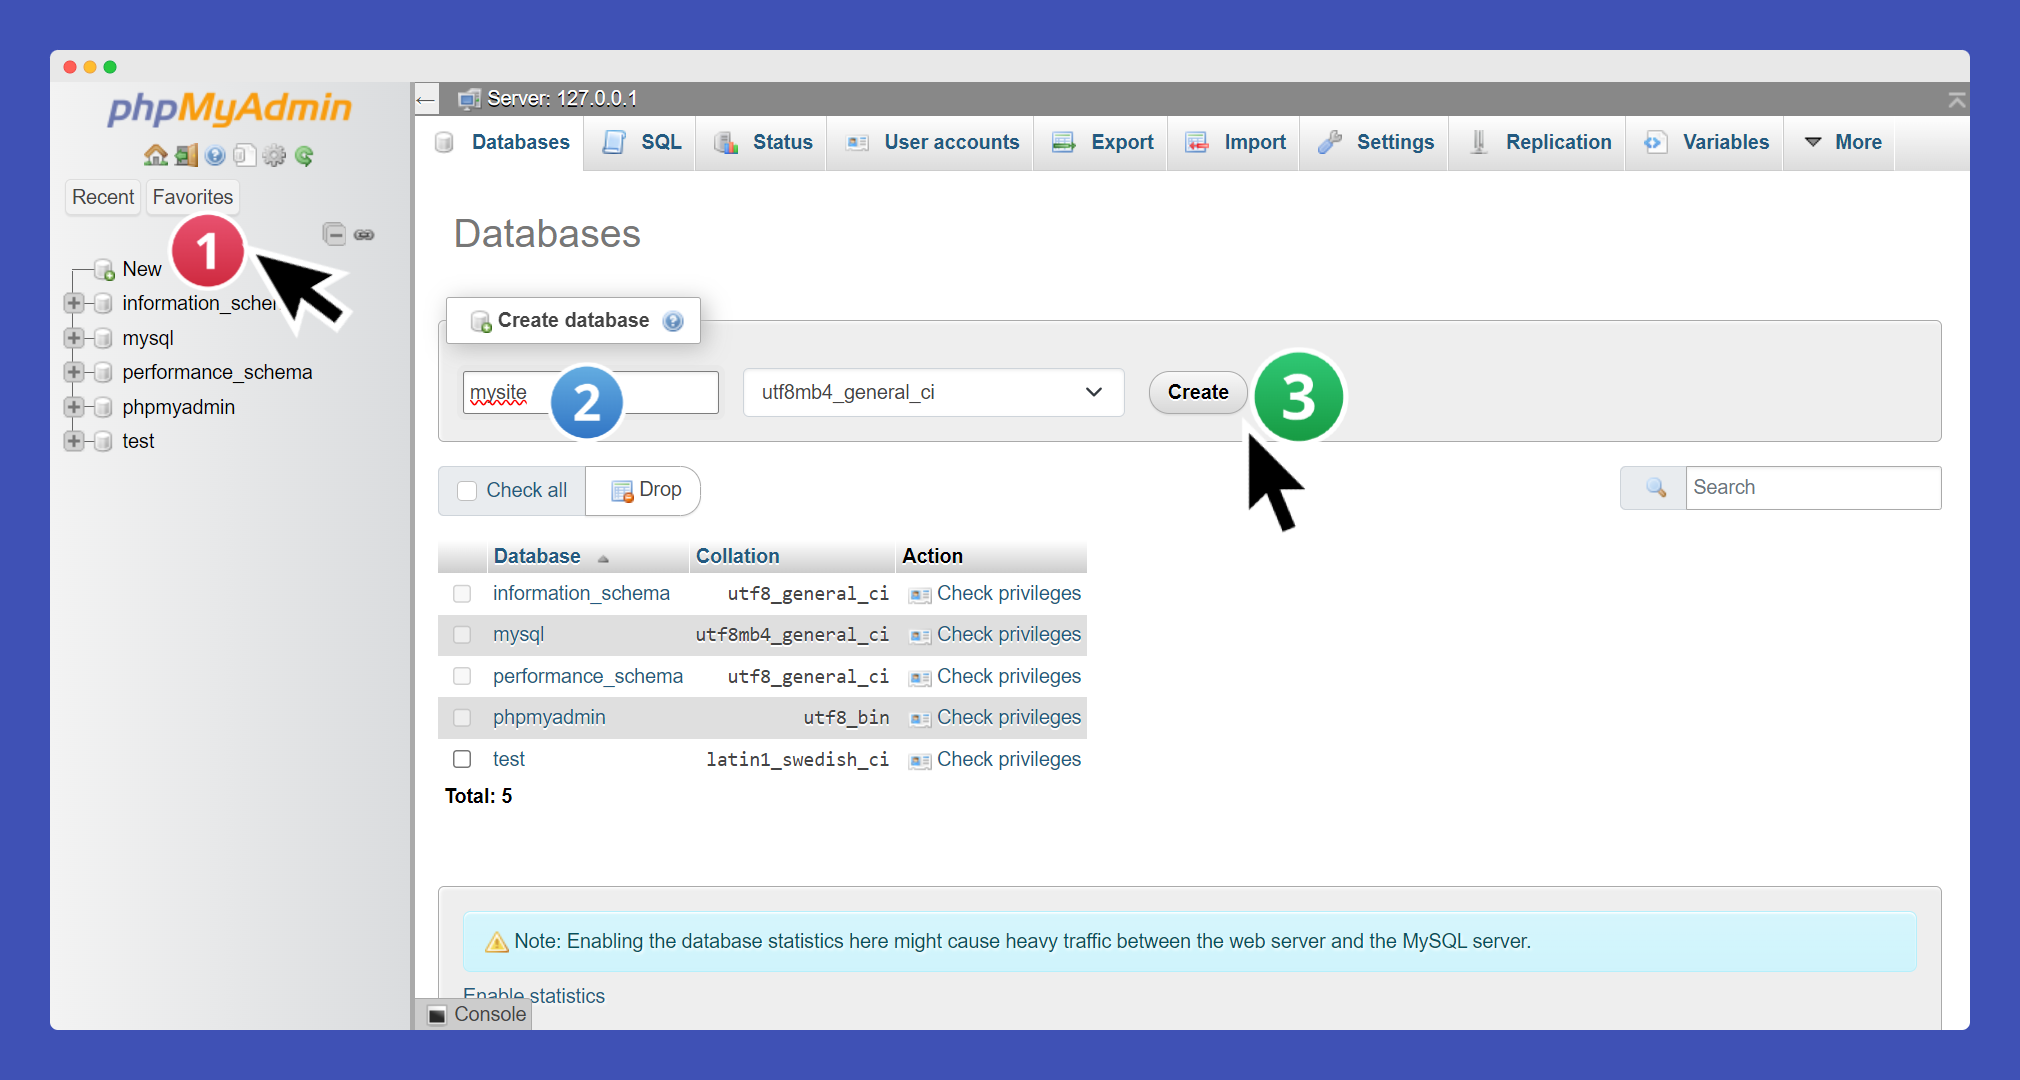
Click on the "Databases" tab and create a new database. Give it a name, e.g.,mysite.
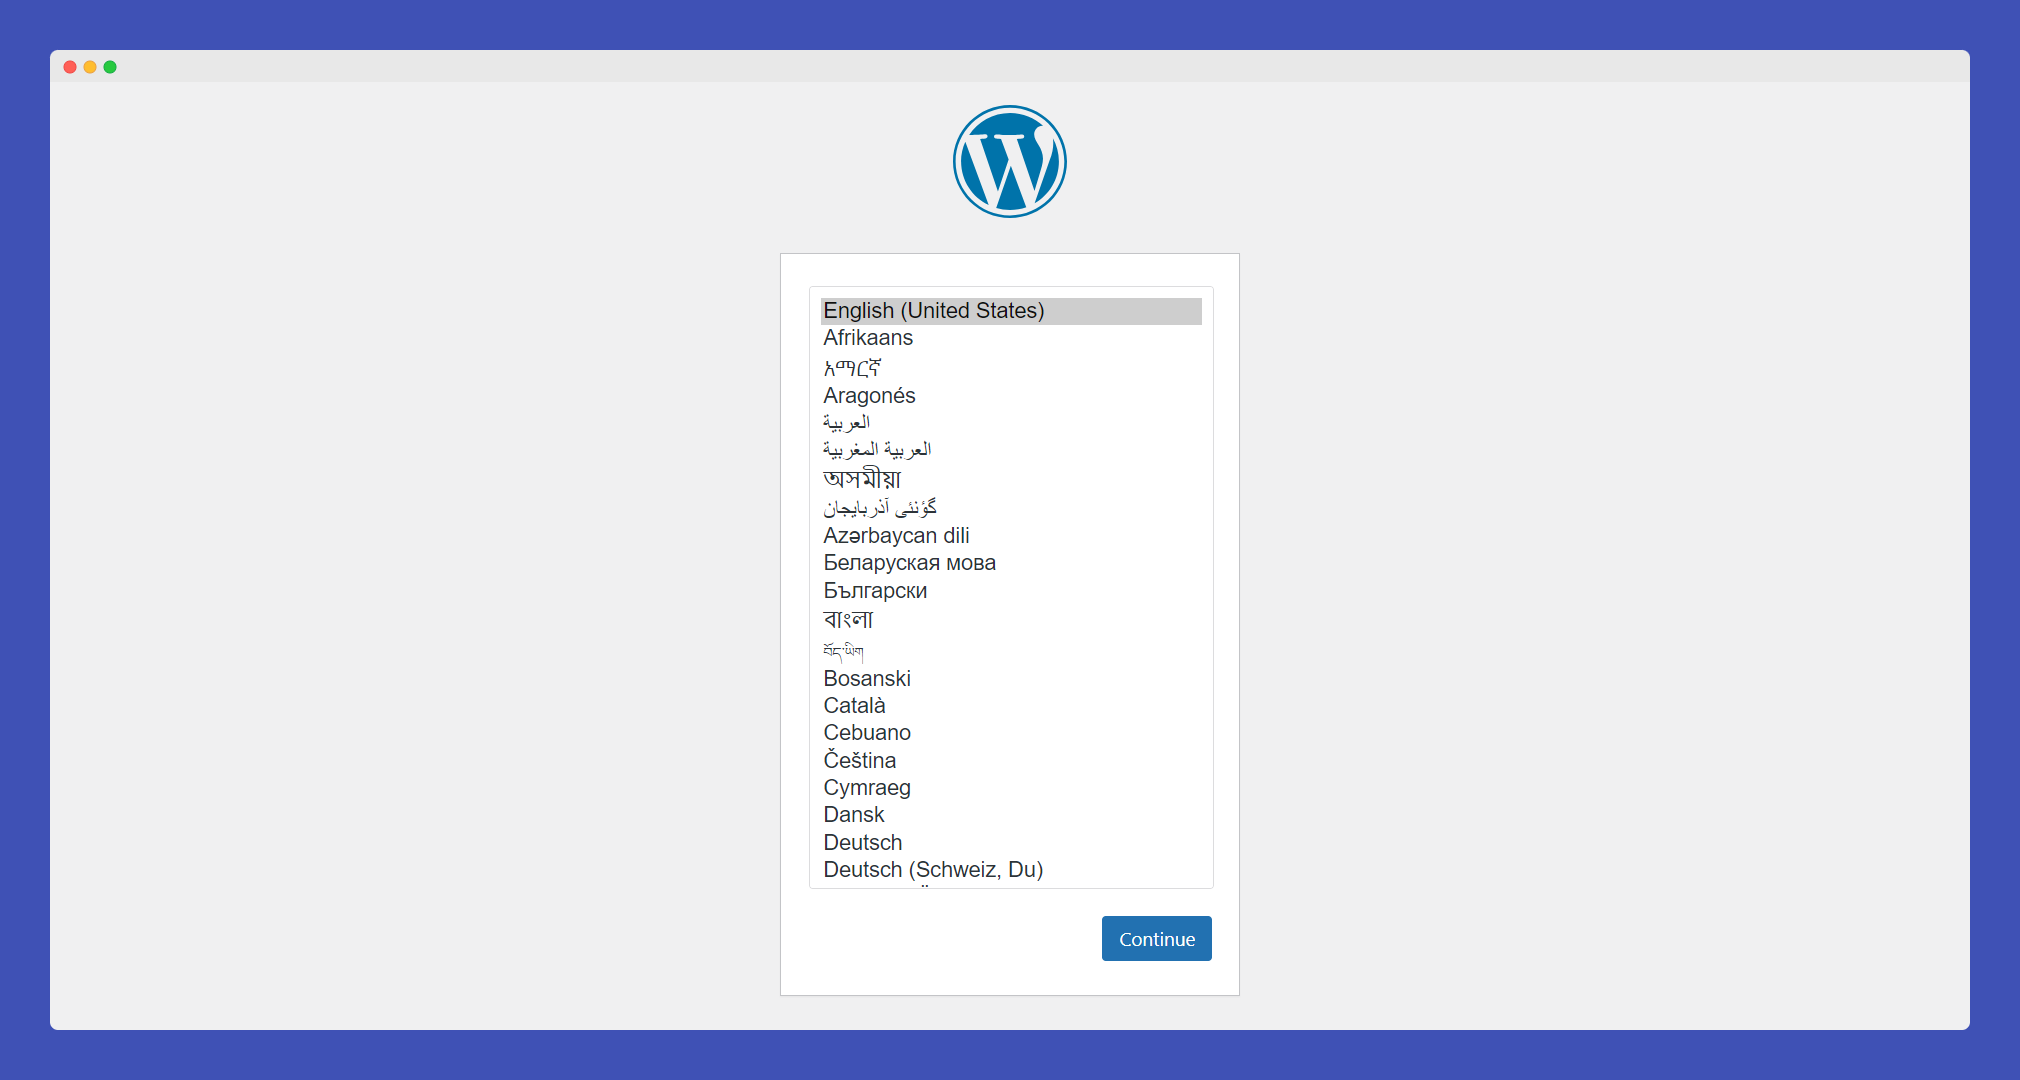
Step 5: Configure WordPress
Open your web browser and go to http://localhost/mysite (or whatever folder you extracted WordPress into). Choose a language of your choice and click "Continue."
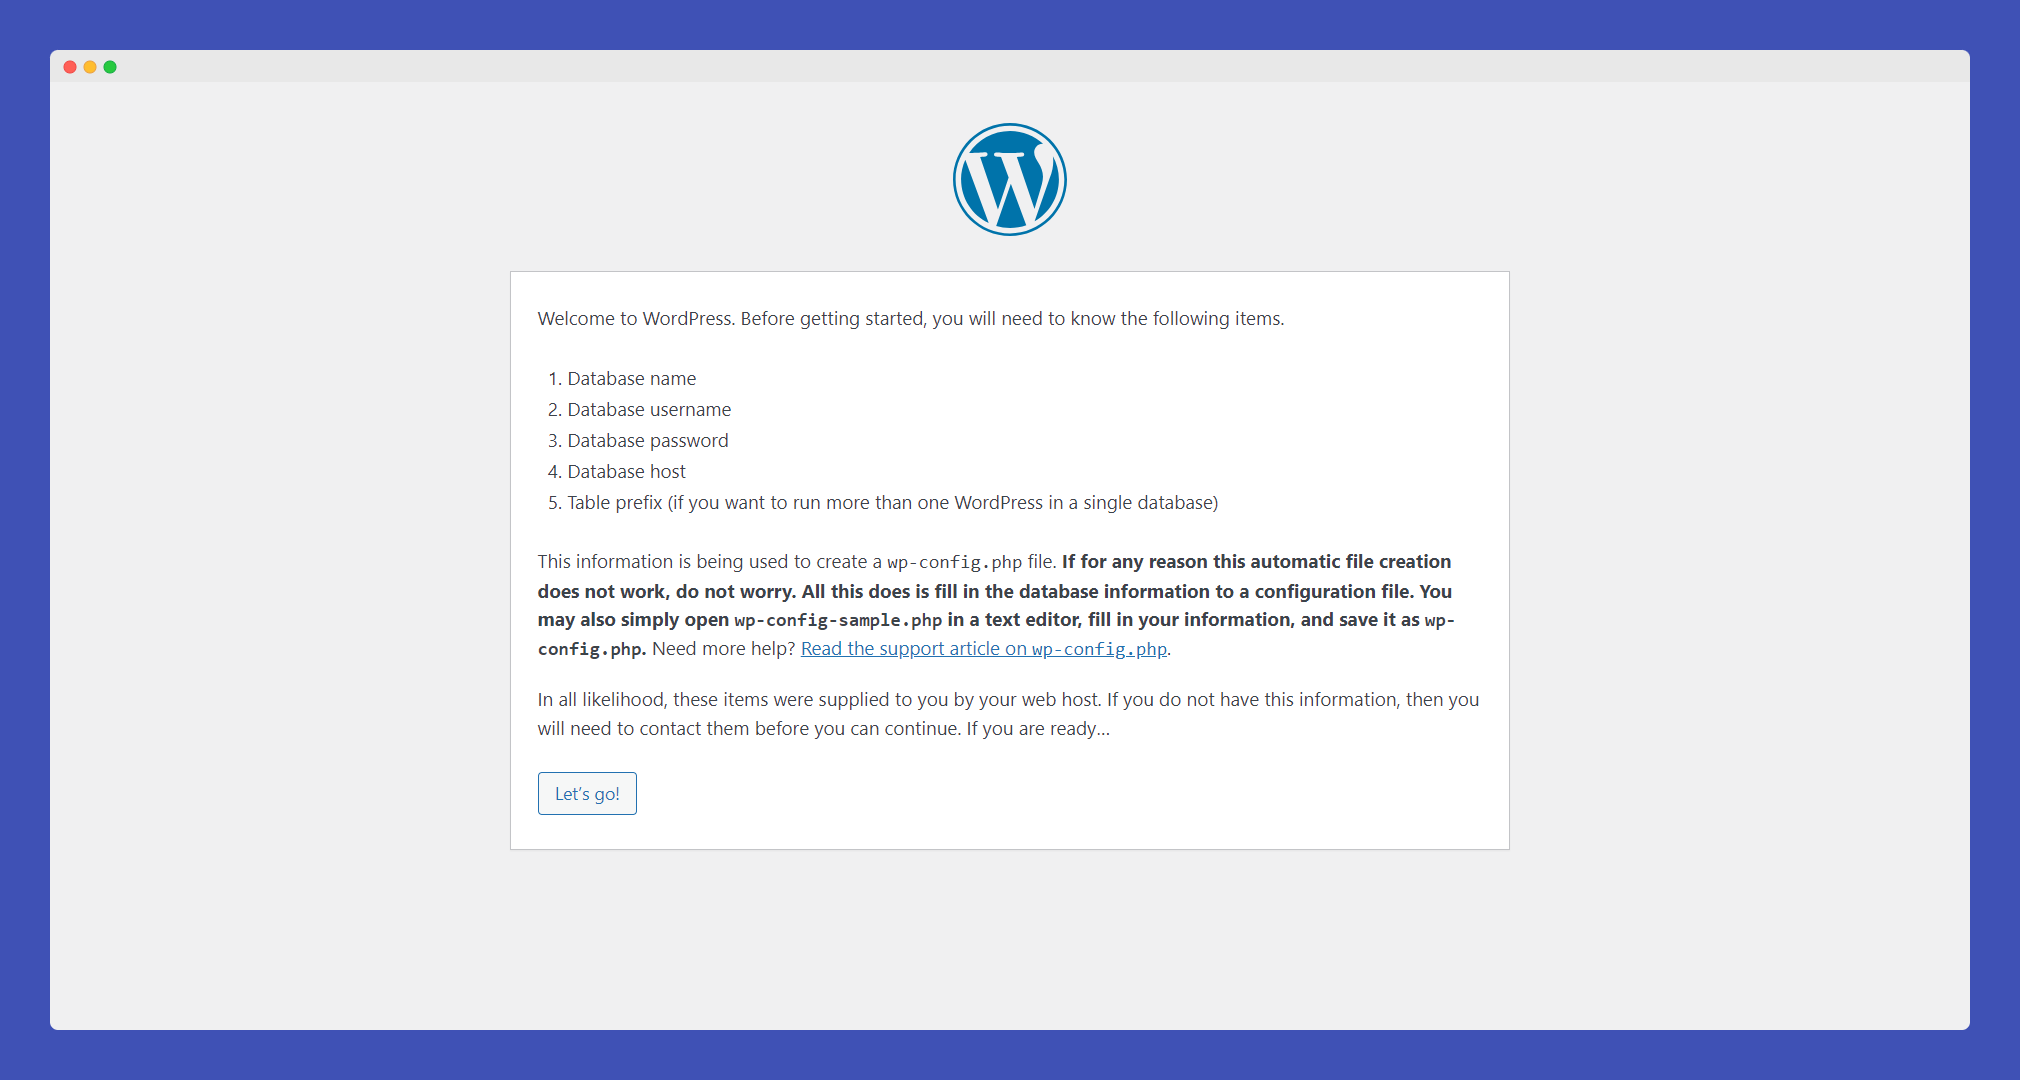
WordPress will prompt you to create a wp-config.php file. Click on the "Let's go" button.
Enter the database information:
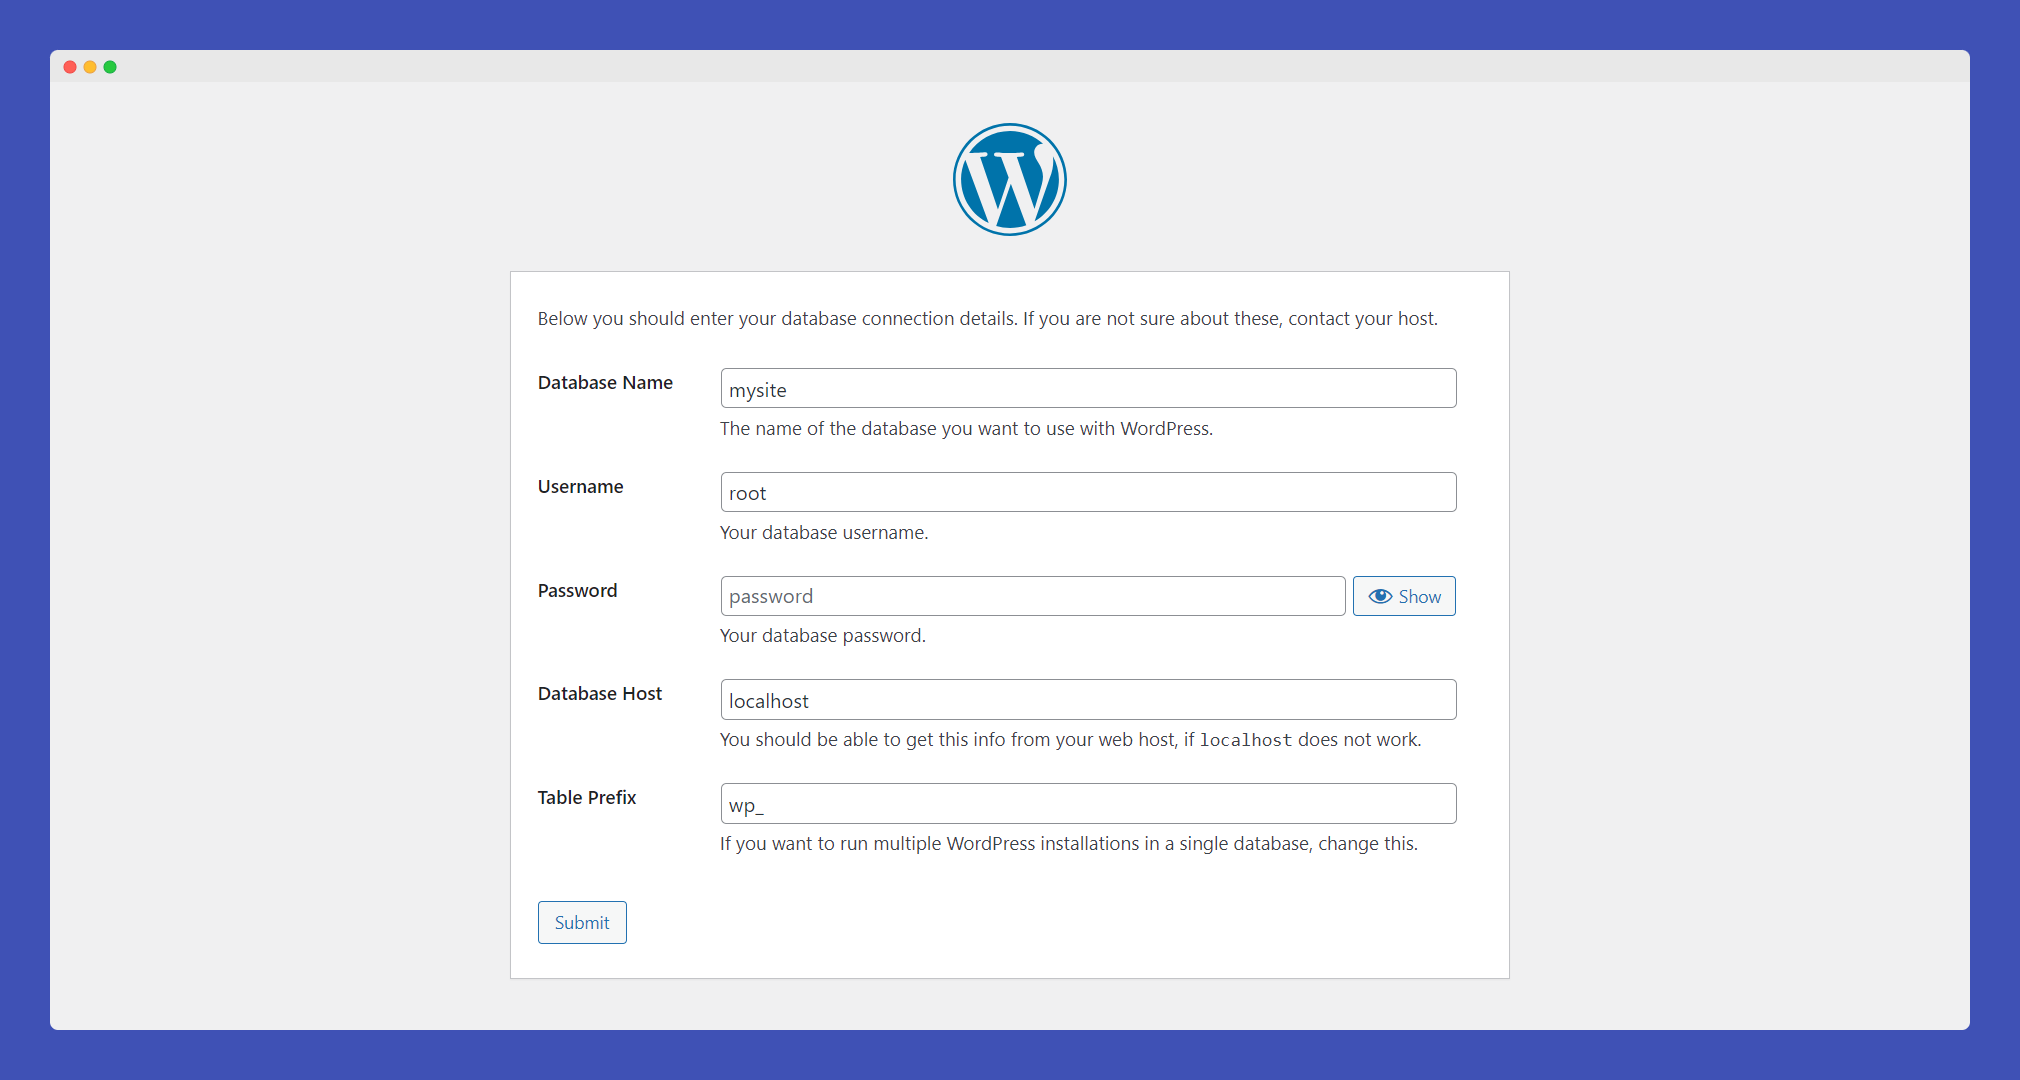
Database Name: Enter the name of the database you created earlier (e.g.,
mysite).Username: By default, it's
root.Password: Leave it blank (unless you've set a password for your MySQL root user).
Database Host: Enter
localhost.Table Prefix: You can leave it as the default
wp_or change it if you prefer.
Click on the "Submit" button, and WordPress will create the
wp-config.phpfile.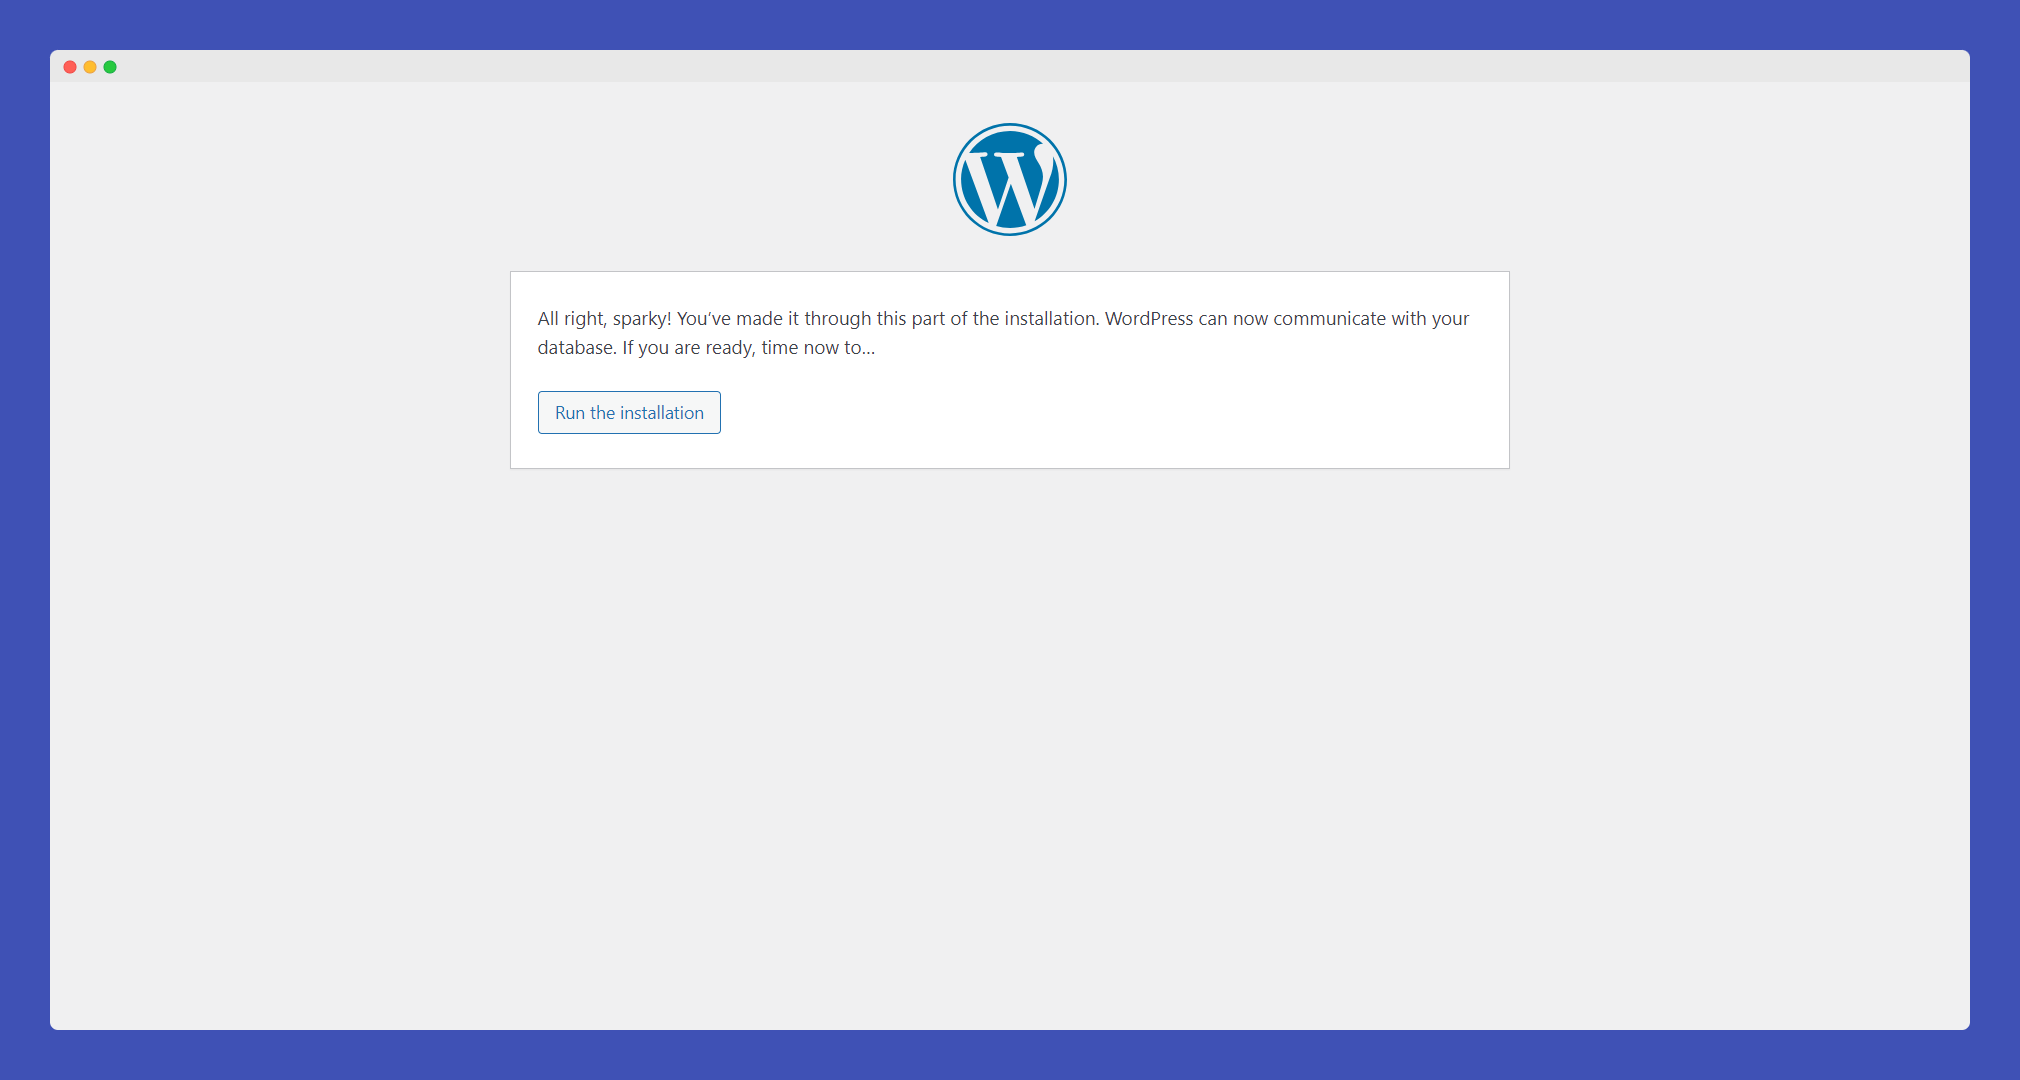
Click on the "Run the Installation" button.
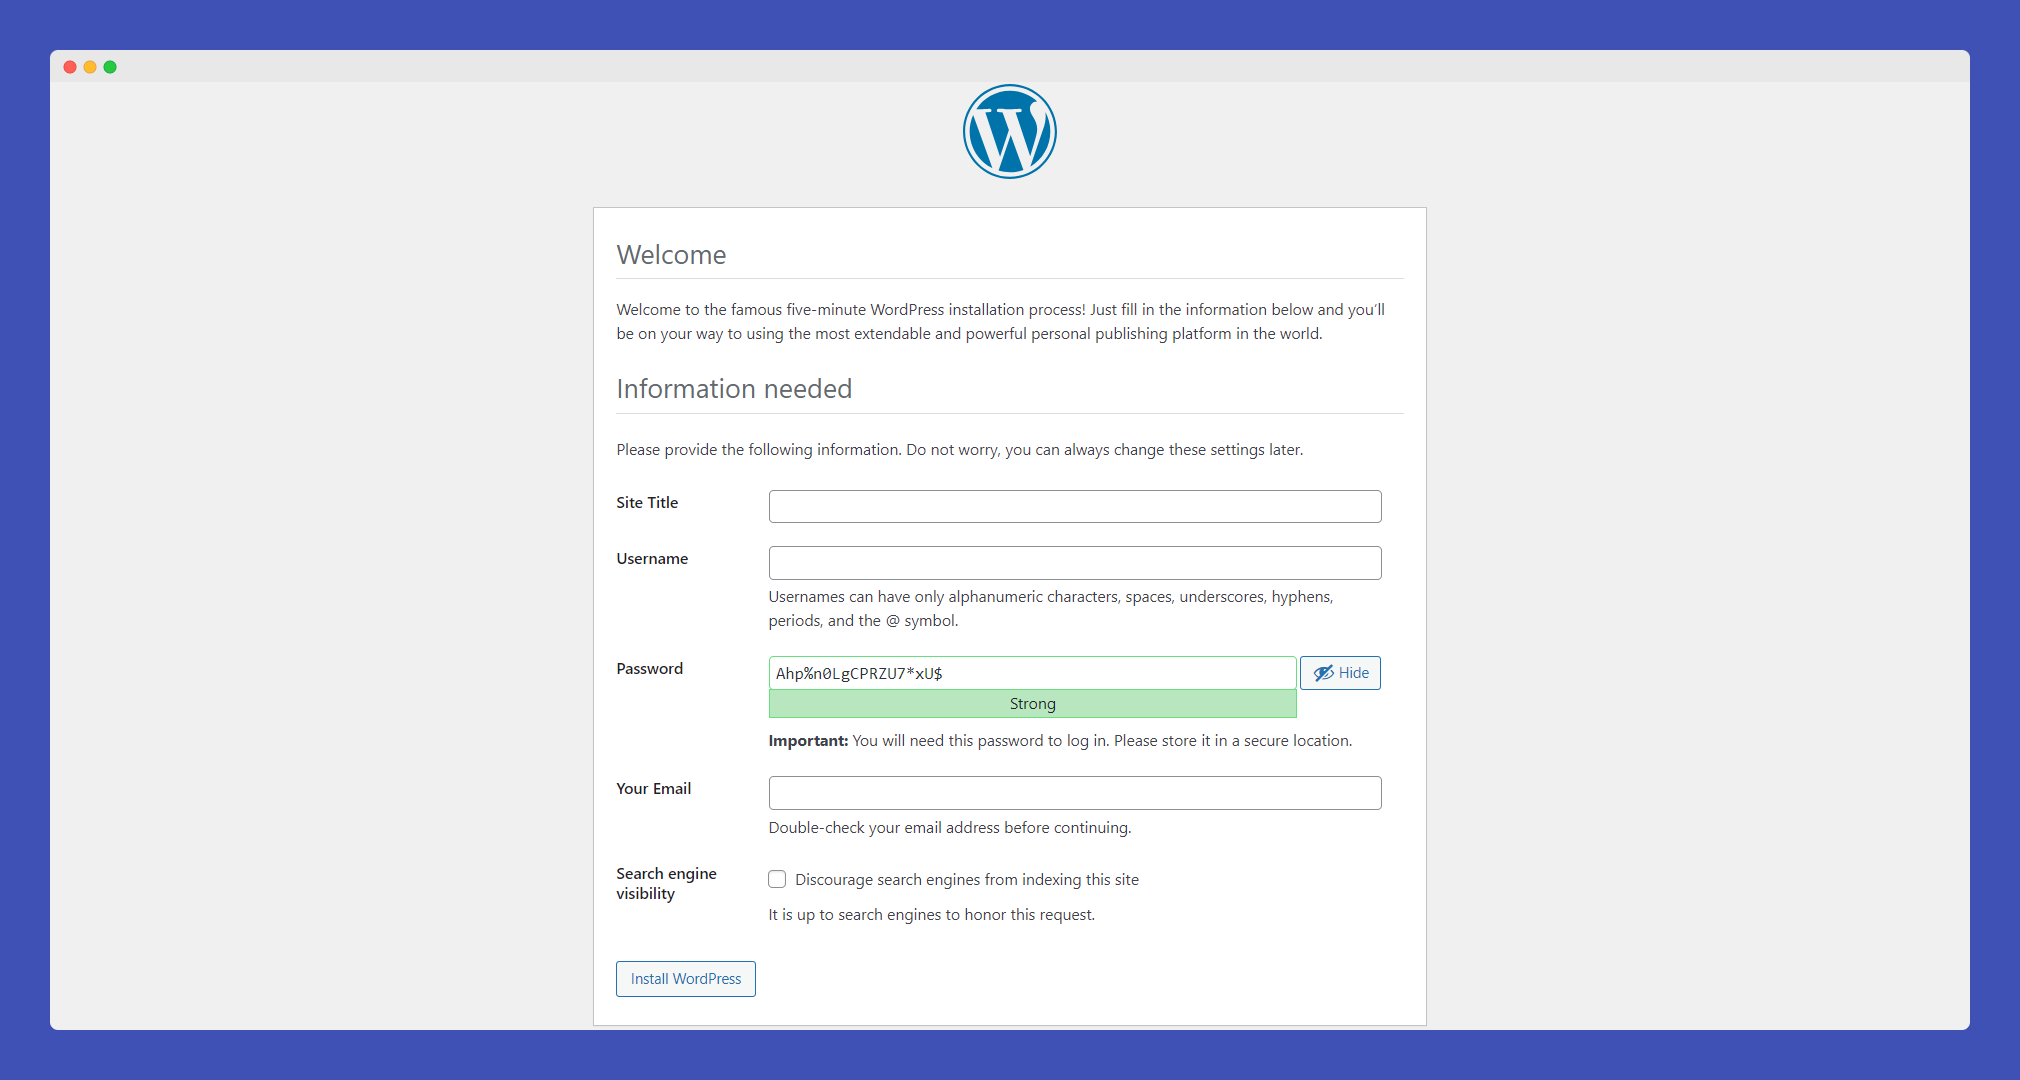
Fill in the required information for your WordPress site, such as the site title, username, password, and email address.
Click on the "Install WordPress" button.
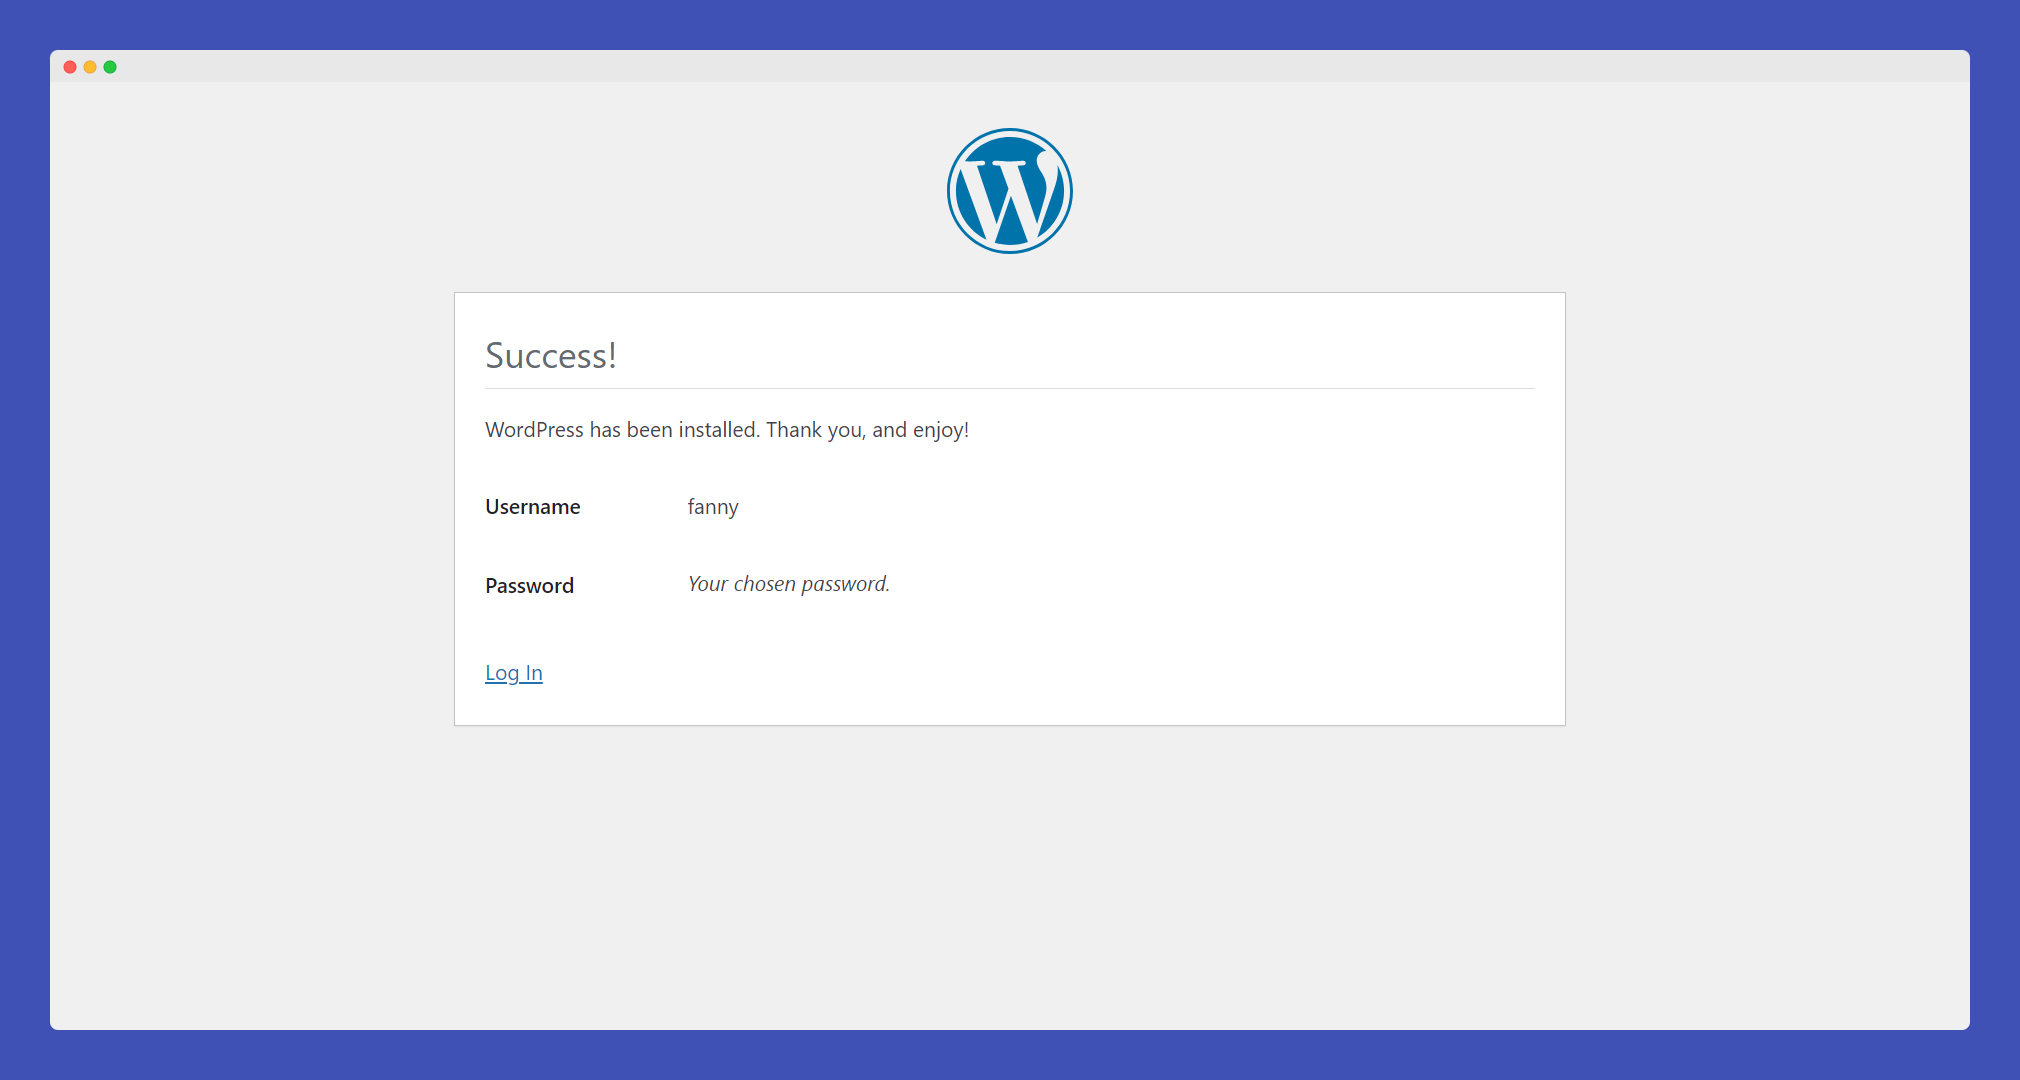
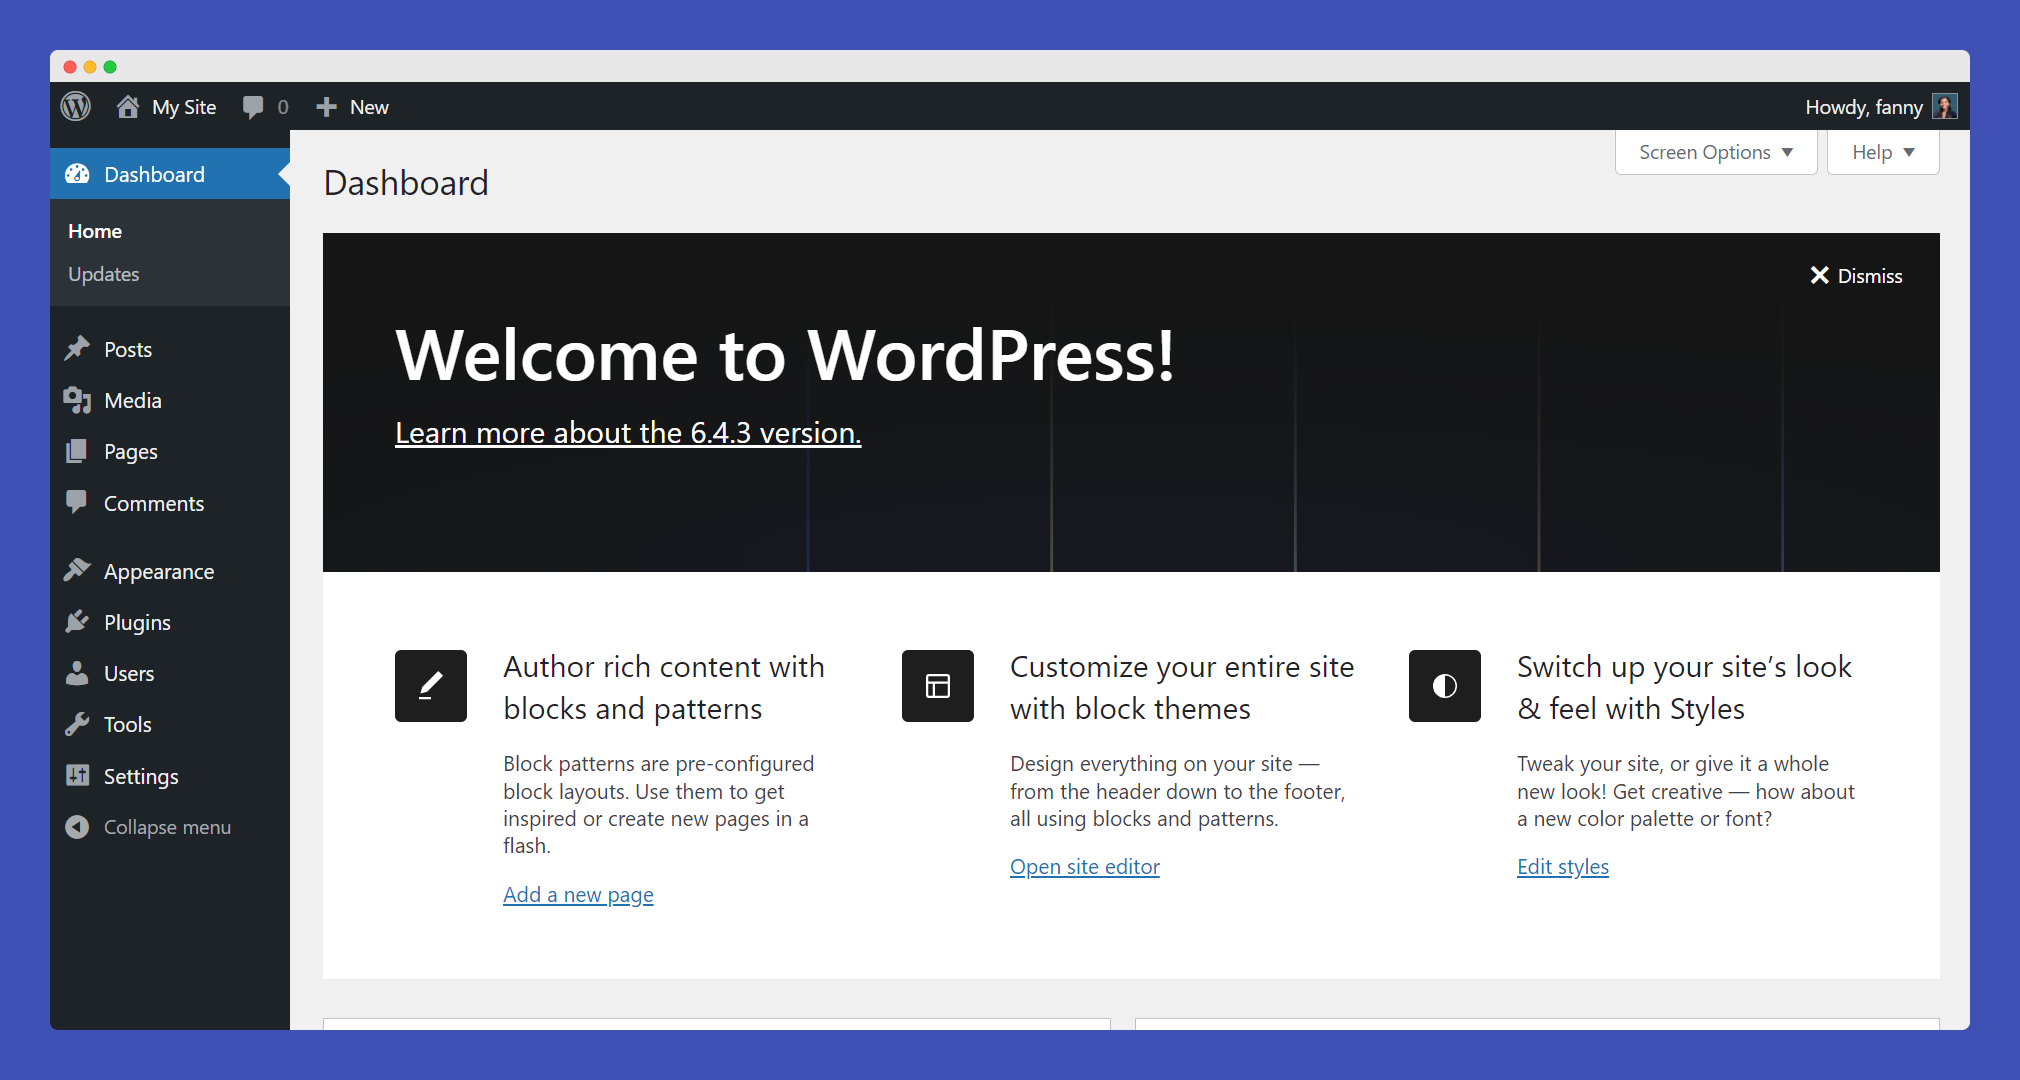
Once the installation is complete, you can log in to your WordPress Dashboard using the credentials you provided.
Step 6: Access Your WordPress Site
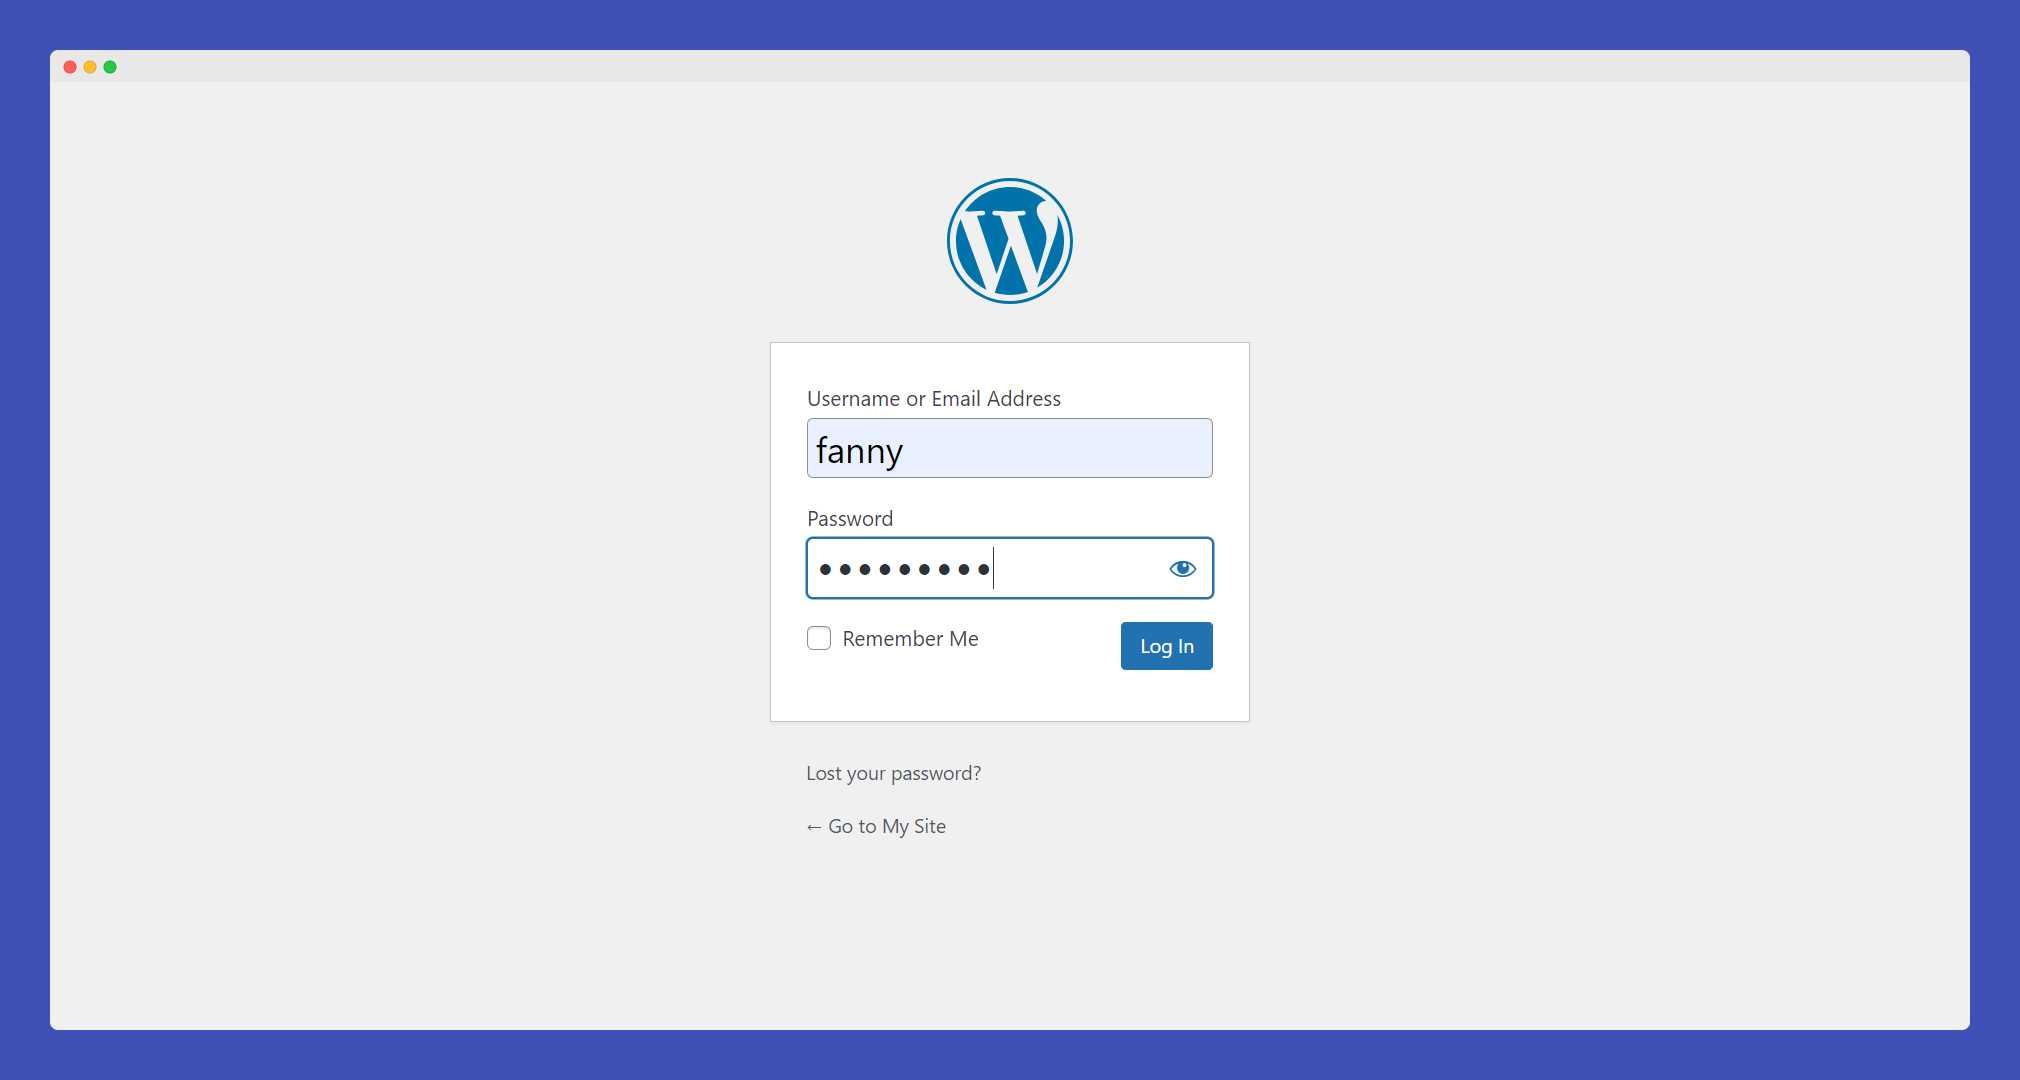
Go to http://localhost/mysite/wp-admin/ to access your WordPress dashboard. Log in using the username and password you set during the installation.
Congratulations! You have successfully installed WordPress via XAMPP on your computer.
Now you can start building and testing your website locally.
Happy Building!


